You can add a new WashConnect User along with the User's personal information.
To add a new User, follow these steps:
NOTE: Only users who already have existing access to Security Roles can log on and manage other user roles. A user cannot assign a role above their level to another User, only roles at the same level or lower. (The Admin role is used in this example.)
- On the Users menu, select Manage Users.
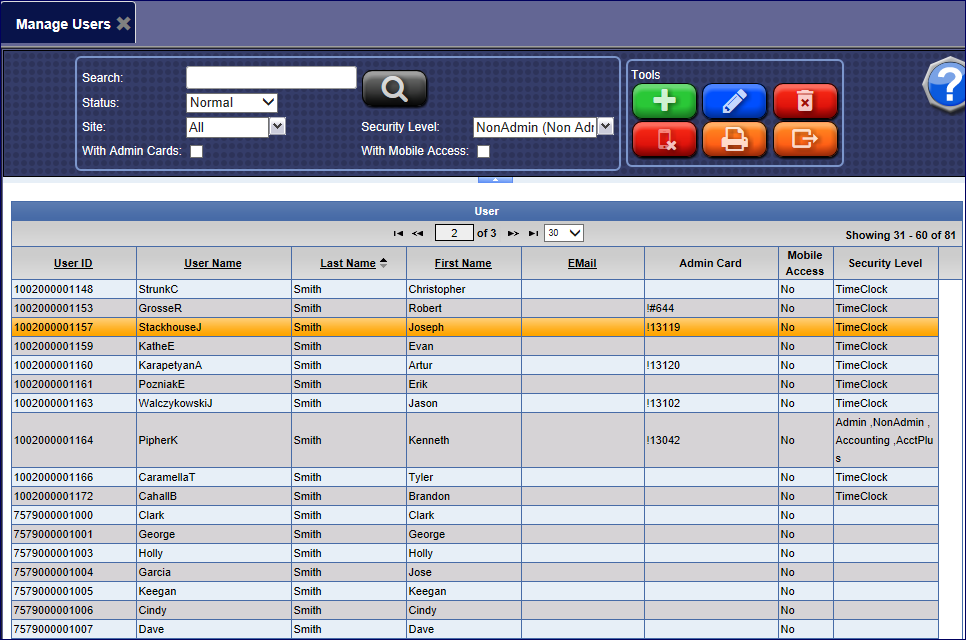
- Click the Add button.

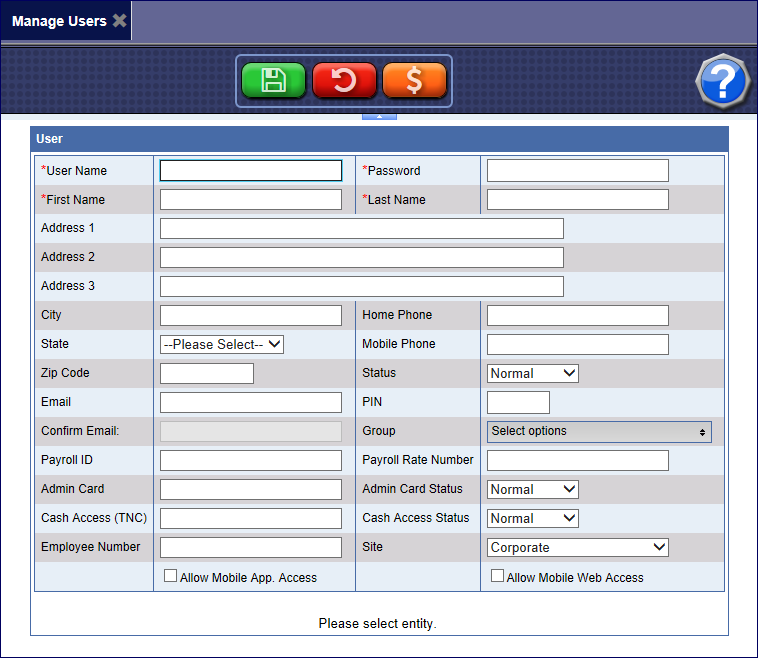
NOTE: Must save information in the four required fields indicated with a red (*) asterisk in order to be able to save a User.
- In the *User Name box, type the user’s name as they want to type it in upon WashConnect Logon.
NOTE: When logging on WashConnect, the User will type the User Name in the User ID box. After logging in, the User Name will appear on the status bar at the bottom of the screen.
- In the *Password box, type a password for the User to logon to WashConnect.
NOTE: Secure password must be at least 6 characters long with at least one uppercase, one lower case, and one number.
- In the *First Name, type the User's first name.
- In the *Last Name, type the User's last name.
- For more information on each of the User fields on this form, see User Descriptions.
- In the PIN box, type in a 4-digit number so the User can access the Auto Sentry service unit screen.
- In the Group box, click to select the highest level group list necessary for this user.
After a group is selected, the Role table appears at the bottom of the Manage Users tab and lists the Security Roles available based on the Group selected for the User.
See organizational levels for more information.
-
In the Role table, click to select the Role check boxes for the user. See Security Roles.
NOTE: Mobile Access feature is optional and validation is required by Technical Support.
- In the Allow Mobile App. Access checkbox, click to select or click again to clear.
The Mobile App Reports section appears.
- Click to select one or more reports the user can view via the mobile app:
- Cars Washed
- Data Comparison
- Employees Working
- Labor
- Sales Distribution
- Terminal Balances
- In the Allow Mobile Web Access box, click to select or click again to clear.
The Mobile Web Account Information section appears.
- In the User Name box, type in a User Name for the Mobile Web Account.
- In the Password box, type a password for the User's Mobile Web Account.
- In the Profit Center box, select a Profit Center from the list.
See Install WashConnect Mobile App, and User can connect to WashConnect from a mobile device.
- In the Payroll ID box, type the payroll number for this employee received from your payroll company.
- In the Payroll Rate Number box, type Payroll Rate Number.
- In the Admin Card box, type the User’s Admin Card number.
Contact Technical Support for Multiple Admin Cards.
- In the Cash Access (TNC) box, type the User’s Admin Card number.
Multiple Admin Cards are only available with WashConnect, and are not available with TunnelMaster POS systems. The Admin Cards can be used for RFID overrides.
- Click the Save button.
The User is added to the list.
After a Security Role is assigned to a user, access to the WashConnect menu items and buttons is limited based on the settings in the Security Role. For example, if you do not want the controller to have access to administrative buttons, you can make them unavailable to him by adjusting his security role privileges.
A warning countdown timer has been added to monitor inactivity in WashConnect. At the end of the inactive time period, the user will be logged off. After being logged off, the same user can log on to WashConnect and continue working from where they left off.