To set up a Prepaid Fleet Account, follow these steps:
IMPORTANT: When a Fleet Account is created, select the Fleet Type carefully. You cannot change from Prepaid Fleet Account to an ROA Invoiced Fleet Account or vice versa.
- Set up your Fleet Rules.
See Add Fleet Rules.
- On the Fleet menu, click to select Accounts.
The Accounts tab appears.
- Click the Add Account button.

The Fleet dialog box appears.
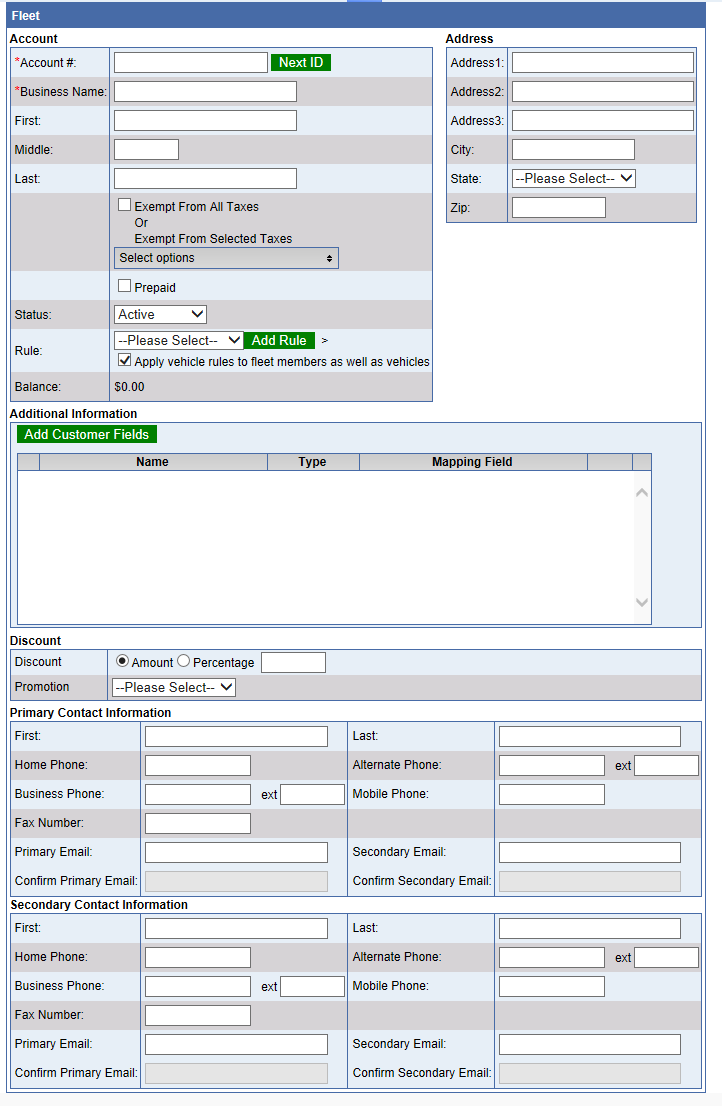
- Required: In Account #, type your account number.
–or–
Click the Account # Next ID  button, the WashConnect® system automatically generates an Account ID number.
- Required: In Business Name, type a name for the Fleet Account.
- In the Prepaid box, click to select.
NOTE: If the Prepaid box does not appear, contact ICS Technical Support so they can turn on this feature.
- Required: In Rule box, select a rule name that applies to this Fleet Account.
- If Fleet Account is tax exempt, make a selection:
- Select Exempt from all Taxes box.
-or-
- In Exempt From Select Taxes, select one or more taxes that the Fleet Account is exempt from paying. Make a copy of the Fleet Account's proper Tax Exempt documentation and keep on file for the company (or individual).
- If Fleet Account is going to receive a discount on sales items purchased, in Discount, type a number (dollar amount or percentage) for the Fleet Discount to be applied at the POS.
- In remaining fields, type any additional information available.
- Click Save.
- If you receive the "Fleet Account saved successfully" message, click OK to continue.