A Sales Items can be a product, service, or discount sold at the car wash. These Sales Items can be sold individually or grouped together in a package.
To add a Sales Item, follow these steps:
NOTE: If you create a sales item at the individual site, you can not sell the sales item at other locations. You may want to set up the Sales Item from Corporate as each individual site can then use the Sales Item setup at Corporate.
- At WashConnect logon, select either Corporate or the individual site.
- On the Configuration menu, click Goods and Services, and then click Sales Items.
The Sales Items tab appears.
- In the Profit Center box, select a profit center from the list that the Sales Item will be sold and tracked in.
NOTE: Profit Centers are important for reporting purposes. For more information, see Profit Centers.
- Click the Add button.

The Sales Item dialog box appears.
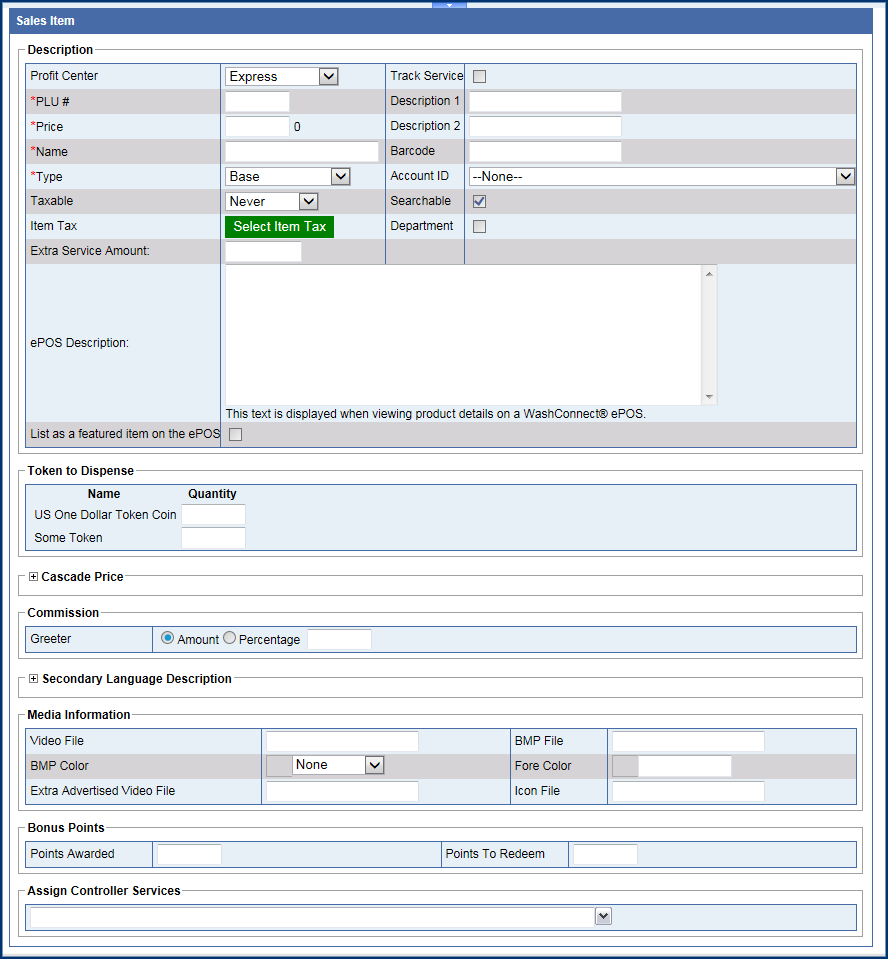
- In the PLU box, type a positive whole number.
Tip: For effective organization, it is recommended that you prepare an organized number system for sales item PLUs with your accountant. (NOTE: PLU# 900-999 are unavailable as the system uses those numbers to generate Club Service PLUs.)
- In the Taxable box, make a selection from the list:
- Always
- Never (default setting)
- Conditional
- Force
- In the Price box, type a Price before tax, and then press the Tab key or click in another box.
To the right of the Price box, the item price, tax, and total for the sales item will display as the price is entered.
NOTES:
- See Item Rounding for more information, if the price appears to be off by a few cents, Price Rounding could be turned on.
- Only the Gas Pump profit center allows three decimal places.
- In the Name box, type the name of the sales item or service.
- In the Type box, select one of the following:
- Base
- Extra
- Discount
- Discount Coupon
- Other
- Miscellaneous
NOTE: PLUs for Coupon Codes can be 3-, 4- or 5-digits in length.
-
Click to select the Track Service box. If Track Service is selected for the Sales Item, this service is set up to be trackable and when a customer comes to a POS, this allows the Greeter to review the customer purchases, if trackable, and when they made that purchase so they can either suggest extra services the customer typically buys, suggest new services, or avoid asking them to purchase a service they recently bought that would be too soon to buy again.
NOTE: When identifying a customer in the POS by customer name, License Plate, RFID, you may select the Customer History button or the Vehicle History button to open the appropriate History form. There is an icon for Trackable Services that appears along the top of the form.
-
In the remaining fields, type any additional information available.
- Click the Save button –or– continue to step #5.