NOTE: The following Frequency Promotion instructions are for ICS payment terminal customers only. If setting up Frequency Promotion for Touch POS, In-Bay, Express, or Full-Service customers, see Cascade Pricing Promotion.
After setting up the promotional packages, prepare up to 10 lines of text to print on the receipt for each corresponding promotional package.
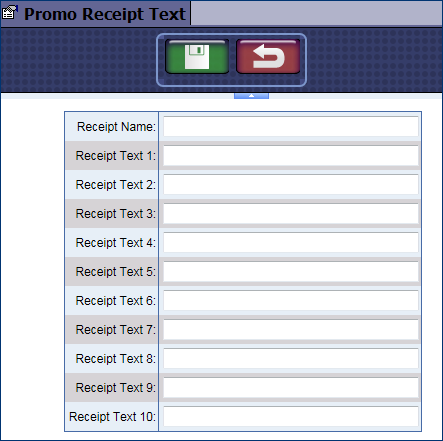
- Select Configuration > Frequency Promotions > Promo Receipt Text.
The Promo Receipt Text tab appears.
- Click the Add button.

- In Receipt Name, type a name for the promotional receipt text.
- In Receipt Text 1, type the first line of text up to 36 characters.
- In Receipt Text 2, type the second line of text up to 36 characters.
- In Receipt Text 3, type the third line of text up to 36 characters.
- In Receipt Text 4, type the fourth line of text up to 36 characters.
- In Receipt Text 5, type the fifth line of text up to 36 characters.
- In Receipt Text 6, type the sixth line of text up to 36 characters.
- In Receipt Text 7, type the seventh line of text up to 36 characters.
- In Receipt Text 8, type the eighth line of text up to 36 characters.
- In Receipt Text 9, type the ninth line of text up to 36 characters.
- In Receipt Text 10, type the tenth line of text up to 36 characters.
- Click the Save button.
Bonus Points can print on the ICS payment terminal receipt.