To create a new Purchase Order, follow these steps.
- Log on to WashConnect at the local site level.
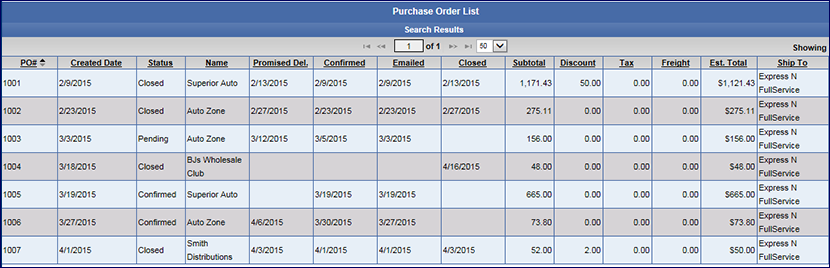
- Select Inventory > Purchase Orders > Create/Edit.
- Click the Add button.

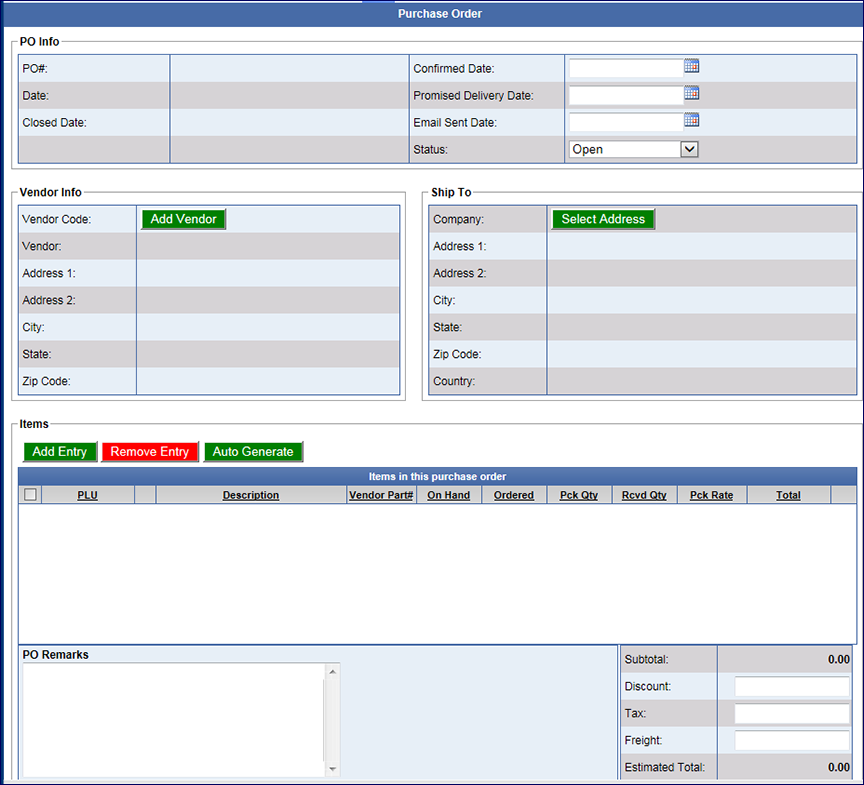
In the PO Info section:
- In the Confirmed Date box, select a date.
- In the Promised Delivery Date box, select a date.
- In the Emails Sent Date box, select a date.
- In the Status box, select a Status from the list.
In the Vendor Info section:
- Click the Add Vendor button.
- From the Select a Vendor dialog box, click to select a Vendor, and then click OK button.
NOTE: Vendors can be added to this list from Manage Vendors.
In the Ship To section:
- Click to select the Select Address button.
- Click the Add a New Address if the address is not listed.
- In the Select Address dialog box, click to select the Address record.
- Click the OK button.
In the Items section:
- Select the Add Entry button.
- Select all the stock items in this purchase order.
-or-
Click the Auto Generate button. Auto Generate will locate all items, based on the filters selected, that currently have On Hand Quantities below their Reorder Points and will order the quantities needed to stock the items to their maximum quantities.
- Click the OK Button.
- In Ordered column, type in the amount ordered.
- In Pck Rate, type in the quantity of package.
- In PO Remarks, type any necessary remarks.
- In Discount, type a discount amount.
- In Tax, type an amount for tax.
- In Freight, type an amount for Freight.
- Click the Save button.
- Also, you can Export or Email the Purchase Order form the Purchase Order screen.