 To add individual customers to a Fleet Account, follow these steps:
NOTE: Prior to adding a customer to a fleet, a Fleet Account must exist. See Add a Fleet Account.
- Open WashConnect, in Region(s) select Corporate, region, or the local site, and then click the Log In button.
NOTE: When logged in at the Corporate location, the entire Corporate structure will be available. When logged in at a site level, only that site will be available for selection.
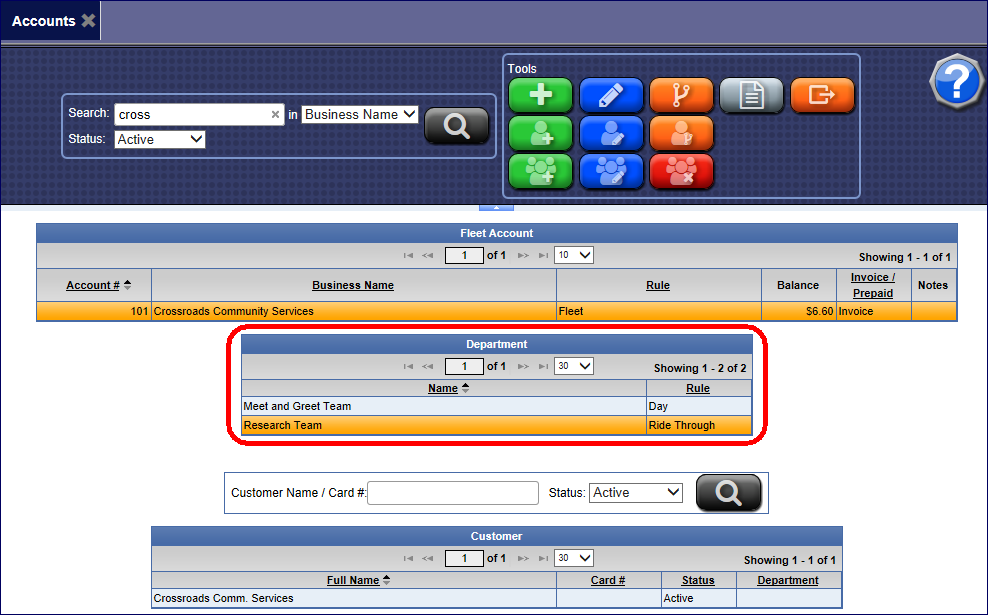
- Select Fleet > Accounts.
The Accounts tab appears.
- Search for a Fleet Account in Account #, Business Name, Card #, License, or RFID/Barcode;
-
and search All, Active, Suspended, or Terminated.
- From the Fleet Account list, click to select a Fleet Account.
The Fleet is selected, and you can view the Department group below the Fleet Account list.
NOTE: If it's necessary to assign customers to separate Departments with their own department's Fleet rules, see Add Departments. Otherwise, they will use the rules tied to the Fleet account. If the customer is assigned to a Department, the rules associated with the Department override the Fleet Account rules.
- Click the Add Customer button.

The Customer Information tab appears with the name of the Fleet Account in the title bar.
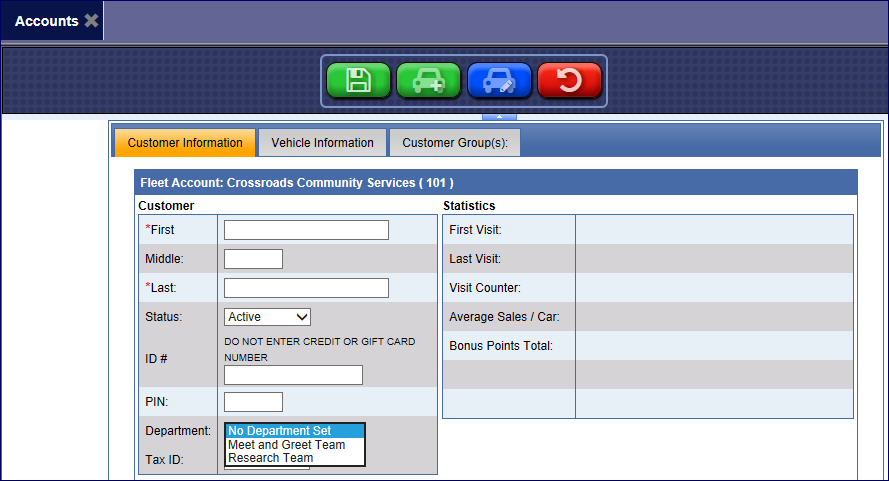
- Required: In the First box, enter the customer’s first name.
- Required: In the Last box, enter the customer’s last name.
- If using magnetic-stripe customer card, type the card number in the ID # box.
NOTE: The Card # is NOT a credit card or gift card number. If using RFID, see add a vehicle to a Fleet Account.
- In the Department box, select a Department from the Department list within the Fleet Account for the individual fleet customer.
NOTE: See Add Department to a Fleet Account
- In the Primary Email and Secondary Email boxes, enter a valid email address.
NOTE: Enabled with primary email below.
- In the Confirm Primary Email and Confirm Secondary Email boxes, enter the valid email addresses again that you typed in the Primary or Secondary Email boxes respectively.
- In the remaining fields, enter any additional available information.
- Click Save.
- If you receive the message, "Customer saved successfully", then click OK to continue.