After adding a customer, a vehicle or multiple vehicles can be added to the customer.
- Open WashConnect, in Region(s) select the local site, and then click the Log In button.
- Select Customers > Manage Customers.
- Search for a customer.
- Click to select a customer record, and then click the Edit Customer button.

-or-
Double-click to select the customer record.
The Customer Information, Vehicle Information, and Customer Group(s) tabs open.
- Click the Add Vehicle button.

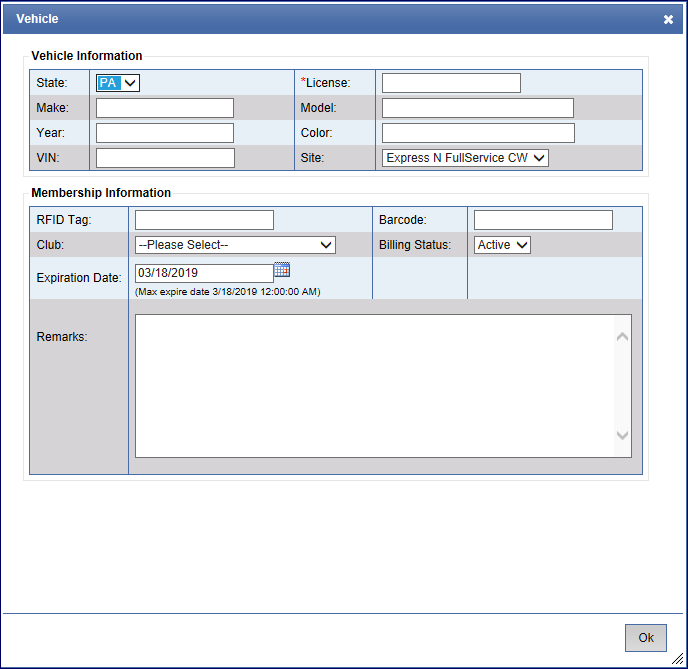
The Vehicle dialog box appears.

- In the State box, select a state where the car is licensed.
- In the *License box, type the customer's license plate number (*Vehicle is the only required field).
- The Site box is for club membership.
NOTE: Club Customers Only, see Add Vehicle for Club Customer.
- In the Make, Model and Year boxes, type in vehicle information. Word complete predicts the word a user intends to enter after only a few characters have been typed into the Make, Model or Year boxes. As the Make or Model is typed in, a list of offered selections appears, and can be selected as soon as the correct Make or Model appears in the list.
-
In the Color box, type the color of the vehicle.
- Click the OK button.
- Click the Save button.
You can add another vehicle performing this entire procedure again.
You can add any other available customer information, or add customer to a group.