The process of adding a Fleet Vehicle begins by creating a Fleet Account and then adding a Fleet Customer. After these initial steps are complete, you can proceed to enter the necessary vehicle information.
NOTE: If Fleet Customers are identified using magnetic-stripe card numbers, entering specific vehicle details is not required.
Add a Fleet Account
Add Customer to Fleet Account
-
Open WashConnect, in Region(s) select Corporate, region, or the local site, and then click the Log In button.
NOTE: When logged in at the Corporate location, the entire Corporate structure will be available. When logged in at a site level, only that site will be available for selection.
-
Select Fleet > Accounts.
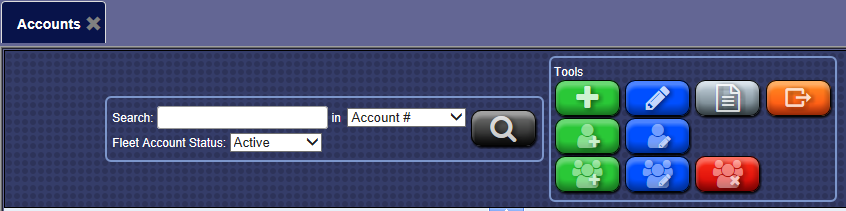
- Scroll through the list to locate or search for a Fleet Account.
- Click to select the fleet account.
The fleet account is highlighted.
- From the Customer grid displayed below the Fleet Account grid, you can search for the Customer.
NOTE: Click a column header to organize in ascending or click again for descending order to locate Fleet Customer.
- Click to select a Fleet Customer.
The Fleet Customer is highlighted from the Customer list and a vehicle grid appears below the customer grid for the selected customer.
- Click the Edit Customer button.

The Customer Information, Vehicle Information, and Customer Group(s) tabs appears with the name of the fleet account in the title bar.
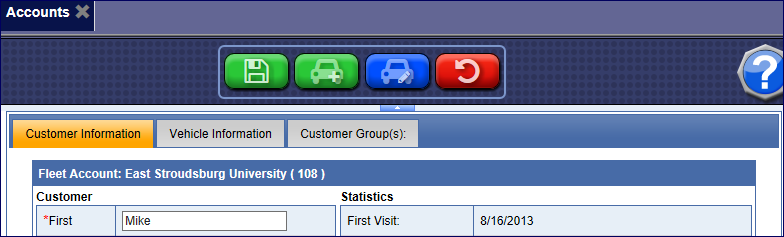
- Click the Add Vehicle button.

-
In the remaining fields, enter any additional information available:
- State
- License (Required)
- Make
- Model
- Year
- Color
- VIN
- Site
- RFID Tag
-
Barcode
- Status: Active, or Terminated
- PIN
- Click OK.

- Click the Save button.
