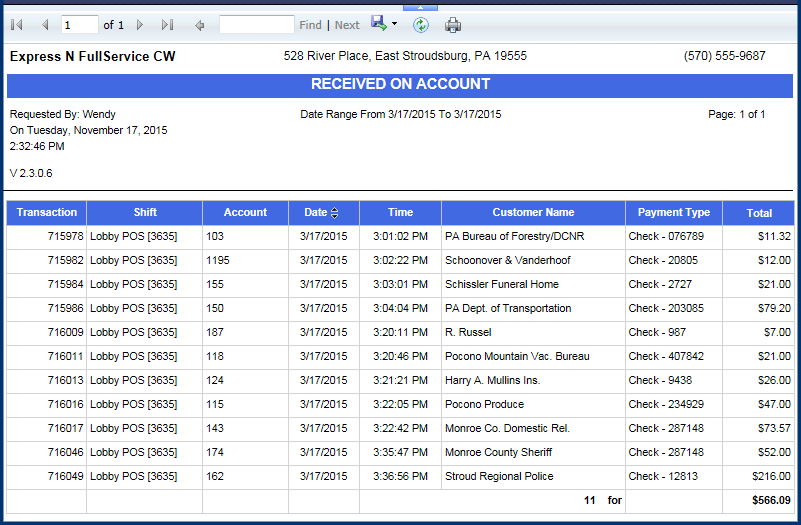
To view the Received on Account (ROA) Report, follow these steps:
- Open WashConnect, in Region(s) select Corporate, region, or the local site, and then click the Log In button.
NOTE: When logged in at the Corporate location, the entire Corporate structure will be available. When logged in at a site level, only that site will be available for selection.
- Select Financial > Register Reports > ROA.

- In the From Date and To Date boxes, select a date range for the report.
- In the Level box, select a site or level from your Corporate structure.
- In the Shift box, select a shift, specific shifts, or All shifts.
- Click the Show accounts per page box to select:
- When it is selected, the report will display one customer per page.
- When the checkmark is removed, the report will simply display all ROA transactions grouped together with no separation by account.
- To save your selections from steps #3 - #6, click the Save Preferences button.

When you open this report tab again, these default preferences will automatically populate.
- Click the View Report button.


- From the Received on Account Report toolbar, you can Export, Save, or Print the report.
Print a Report
Export a Report
Report Toolbar