
Prerequisite: User must have the security role with Invoice permission.
-
Open WashConnect, in Region(s) select Corporate, and then click the Log In button.
NOTE: Invoice is only available from the Corporate login.
- Select Fleet > Invoice.
- Select the Generate Invoice button.

The Generate Invoice(s) dialog appears.
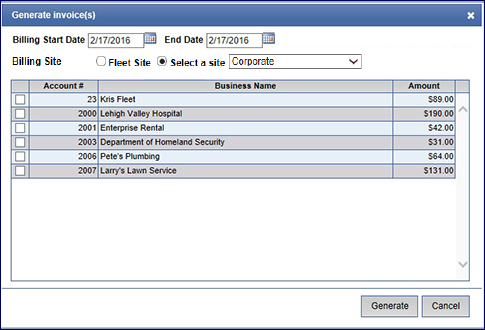
- In the Billing Start Date box, enter or select the beginning date for the generated Invoice period.
- In the End Date box, enter or select the ending date for the generated Invoice period.
- In the Billing Site area, select either Fleet Site or Select a site, and then select a site from the list. The User can select the billing location for the assigned Invoice by selecting the site where the Fleet Account was created or from a list of all available sites.
NOTES:
- The End Date must be earlier than or equal to the current date.
- If the date range selected already has generated an invoice for an account, the invoice will not show up in the Generate Invoice list.
- If the Generate Invoice(s) dialog box does not appear, you may have Unverified Shifts for the dates selected. First, you need to either select different dates or Verify the Unverified Shifts.
- When attempting to generate an Invoice for a Fleet Account with a non-billable amount such as $0, you can view it in the list but cannot generate or print the Invoice.
- If an account is not listed, there is either no data available or another invoice exists for that Fleet Account for the selected billing period.
- Click to select the Fleet Account check boxes.
- Click the Generate button.

The message "Invoice generated successfully" appears.
- Click OK.
The Fleet Invoice list includes these Generated Invoice(s).

IMPORTANT: Prepaid Fleet Accounts cannot be invoiced.