To add a Schedule to a profile, follow these steps:
- On the Configuration menu, click Goods and Services, and then click the Profiles button.
- Click to select a saved Profile from the Profile list. (Active profiles are highlighted in green.)
This is the Profile to which you will assign the schedule.
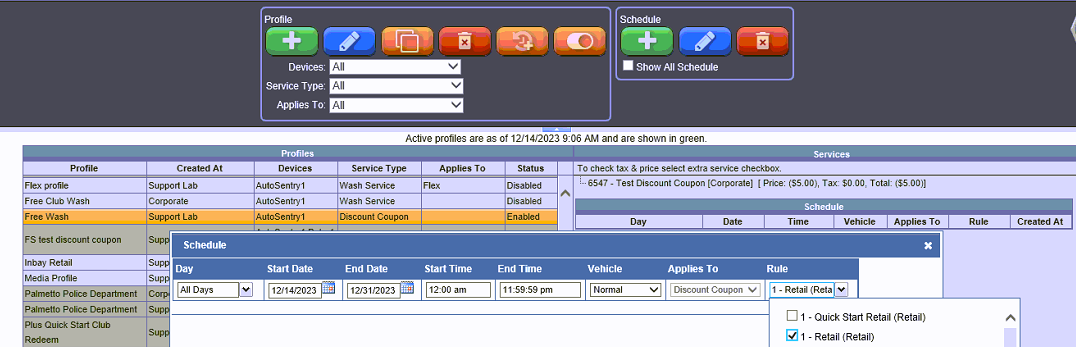
- In the Schedule area, click the Add Schedule button.

The Schedule dialog box appears. Next, set the days and times for the profile to be active.
- In the Day of Week box, select All Days or the individual day(s).
- In the Start Date box, select a start date.
- In the End Date box, select an end date if necessary.
- In the Start Time and End Time boxes, select a specific time, if necessary.
- In the Vehicle Height box, select Normal or High Vehicle.
- In the Applies To box, select a category this Profile applies to:
- Retail (Main Menu)
- Club
- Paid Ticket
- Open Ticket
- Coupon
- Club Sales (Club Menu)
- Gift Sales
- Flex (Additional Main Menu)
- Fleet
- Book Sales (Wash Book)
- Customer Group
- Discount Coupon (automatically selected for a discount coupon profile)
- In the Rule box, select a rule from the list, and then click OK.
NOTE: When setting a schedule for a Discount Coupon Profile, select a Rule which is essentially the profile (retail/flex/club) to apply the discount coupon to.
- Click the Save button.

The schedule is assigned to the profile. Controller Services need to be set up for the individual sales items in the saved Profile.
- Click the Enable button, if necessary.

-
If the Status column displays Enabled, and the profile has a valid schedule, then the profile will be completely enabled.
NOTE: Click the Disable button to disable. 
Steps to follow when setting up a Profile:
Step 1: Add a Profile
Step 2: Add a Schedule
Step 3: Enable Profile