NOTE: This feature is only available from Corporate. It's optional and only available if you previously setup a WashConnect ePOS with Technical Support. Additional fees apply.
Create a separate ePOS Profile for Corporate and one for each individual site. If there is no profile for an individual site on the store front page, the featured items and discount coupons display from the corporate profile. Contact technical support if you do not want to use the Store Front menu as only they can hide the store front.
- Set up WashConnect ePOS with Technical Support.
- From the WashConnect logon screen, select the Corporate level.
- On the Configuration menu, select Goods and Services, and then click ePOS Profiles.
- Click the Add button.
- Type a name for the Profile.
- In the Site box, select a site or All Sites.
- Add Wash Services and Extra Services to the ePOS Profile.
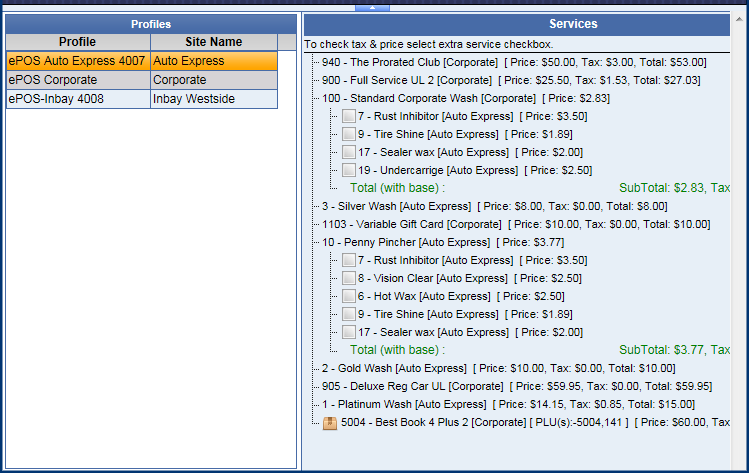
The example below shows a corporate site and two individual sites. It will not allow you to create more than one ePOS profile for the same site. On the Corporate site, you can only assign corporate PLUs. At the site level, Corporate PLUs and PLUs created at that site can be displayed on the ePOS Profile.
The items assigned in the profiles represent everything you want to sell on your WashConnect ePOS. This includes base washes and their assigned extras (example below – PLU 100 is a base and PLUs 7,9,17, and 19 are its extra services), Clubs (PLUs 900, 904, 905), Gift Cards (PLU 1103), and Wash Books (5004).